


Tips and Advice for How to Sealing a Shower Tray
Water leaks from shower enclosures and shower trays can be difficult to fix and will often cause damage to the fabric of your home. The most common cause of water leaks from shower trays is associated with poor application and deterioration of silicone sealant. Here are some top tips for applying silicone sealant correctly to shower trays and preventing water leaks.
IMPORTANT NOTE
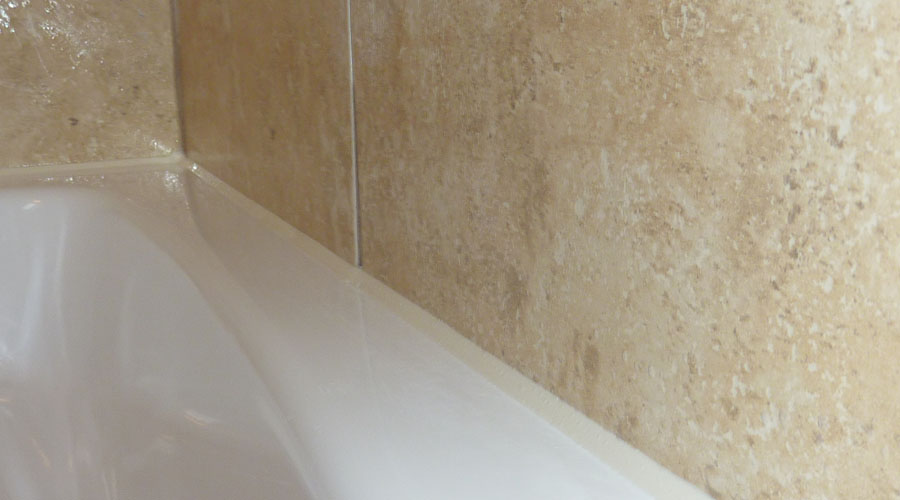
For a shower enclosure to be water tight and operate correctly the shower tray should be fully sealed with silicone sealant to the tiles or surrounding waterproof walls and the sealant should have cured fully prior to installing the shower door, screen or enclosure. If the shower enclosure is fitted before the shower tray has been correctly sealed water will often leak into the walls or on to the floor from the area where the shower enclosure wall fixing profiles meet the walls. This is one of the most common causes of leaks from shower enclosures and following this simple advice will prevent this issue.
Preparation and the right tools are the key to applying silicone sealant
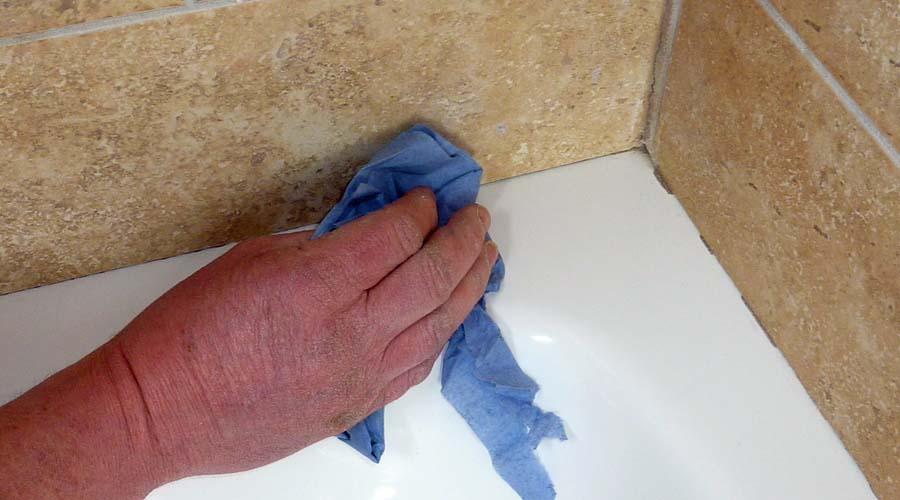
Preparation is key when applying silicone sealant. All surfaces that are to be sealed MUST be clean, completely dry and free from dust and all tiling and grouting must be complete. Always use a good quality sanitary silicone sealant that contains antibacterial and antifungal agents as these will help to prevent mould growth.
It is also important to read, and follow precisely, the silicone sealant manufacturer’s instructions. and pay careful attention to curing times which may differ from product to product but a general rule of thumb is a minimum of 24 hours to cure before you use the shower enclosure or get the silicone sealant wet. Failure to allow the silicone to cure properly will result in the seal failing, causing the shower tray to leak. Rectifying this issue will require the shower enclosure and all of the old silicone to be removed which is a messy and time consuming job.
Purchasing a few inexpensive tools will also help you to achieve a neat, consistent and watertight seal.
- A good quality silicone sealant application gun – required to apply the silicone sealant consistently and achieve an even bead that will be easier to smooth to a neat finish once applied.
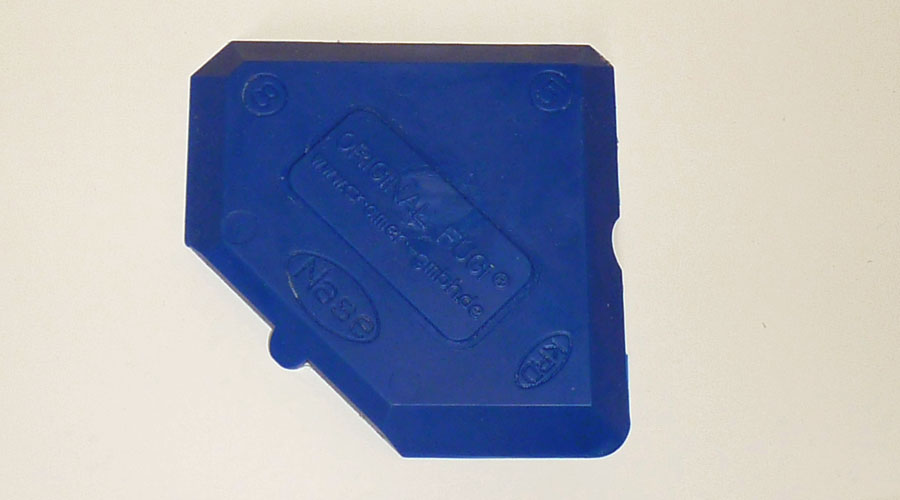
- A silicone sealant application tool – handy and inexpensive tools that are made from rubber or plastic which are designed to remove excess silicone sealant leaving a neat and consistent finish. Sealant application tools are often square or rectangular and made from stiff rubber with cut outs on each corner for achieving bead thicknesses of varying shapes and sizes.
- Latex rubber gloves – silicone sealant is messy and it is much easier to dispose of gloves than to wash it off your hands.
- Finally, ensure that you have a roll of kitchen towel and a plastic waste bag to dispose of excess silicone sealant and be warned, if you get silicone sealant on carpets, furnishings and clothes it is almost impossible to remove.
Applying silicone sealant
- If you are using a silicone sealant applicator, select the correct aperture to achieve a finished bead that will completely cover the gap between the shower tray and tiles or waterproof wall covering.
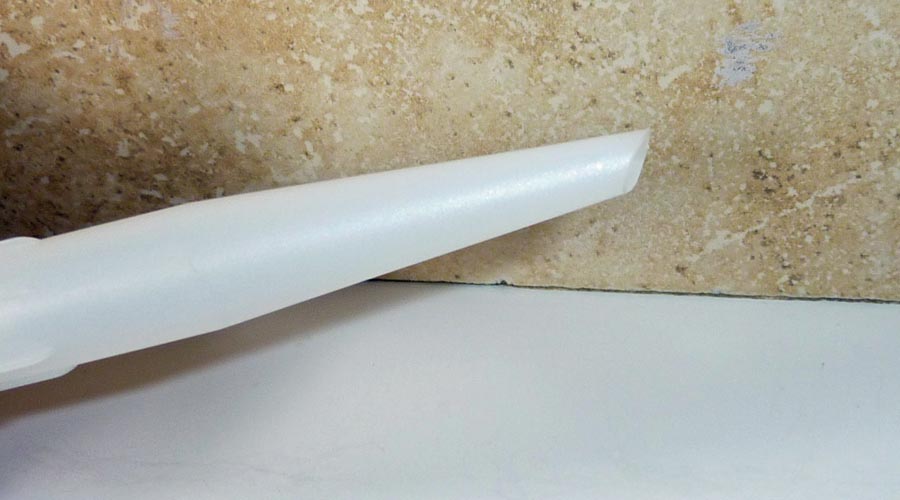
- Trim the nozzle on the tube of silicone sealant at a 45 degree angle to produce an opening large enough to adequately cover the gap between the shower tray and tiles or waterproof wall covering. A nozzle aperture of between 5-8mm will usually suffice, it is far easier to add more silicone sealant that to remove it!
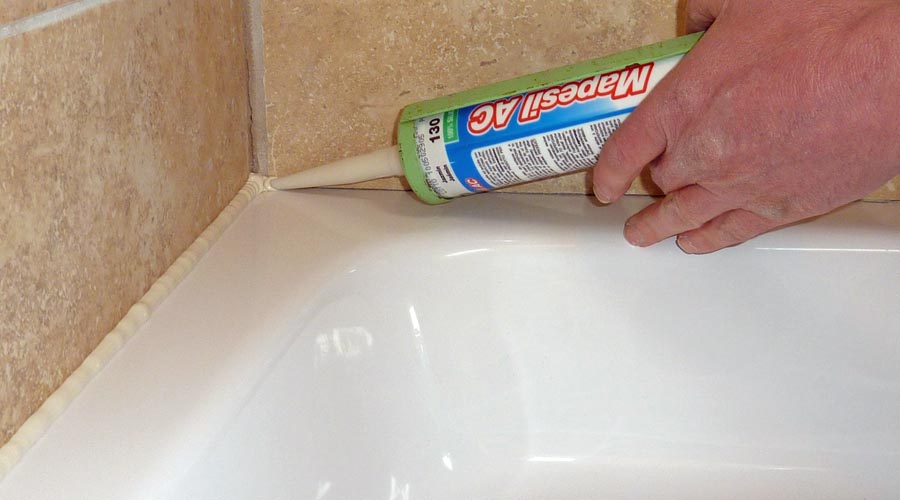
- Place the tube of silicone sealant in to the application gun and apply gentle pressure until the sealant appears at the nozzle then release the pressure from the gun. Some silicone application guns feature a lock behind the trigger to relive the pressure. Wipe away any excess silicone from the nozzle with paper towel and dispose of it immediately.
- Start in the back corner of the shower tray (a shower tray in an alcove surround by three walls will have 2 internal corners. Start by applying silicone sealant from one corner to the other along the back wall), place the nozzle of silicone sealant tube into the corner so that the silicone sealant will make contact with the shower tray and walls and so that the silicone will also fill the gap between the two surfaces.
- Apply gentle but constant pressure on the trigger of the silicone sealant gun and draw the bead from back to front along the surface of the shower tray. When the front edge of the shower tray is reached release the pressure from the silicone gun and wipe away any excess silicone from the nozzle making sure that you dispose of the waste immediately.
- Ensure that the silicone sealant bead is sufficiently thick to cover the gap between the shower tray and walls. If the bead is too thin in any areas add a little more silicone sealant now but be careful not to add too much as it will be difficult to remove.
- You should now have achieved a continuous and consistent bead of silicone sealant between the surface and walls around the entire perimeter of the shower tray and you are now ready to smooth it to a perfect finish using the application tool
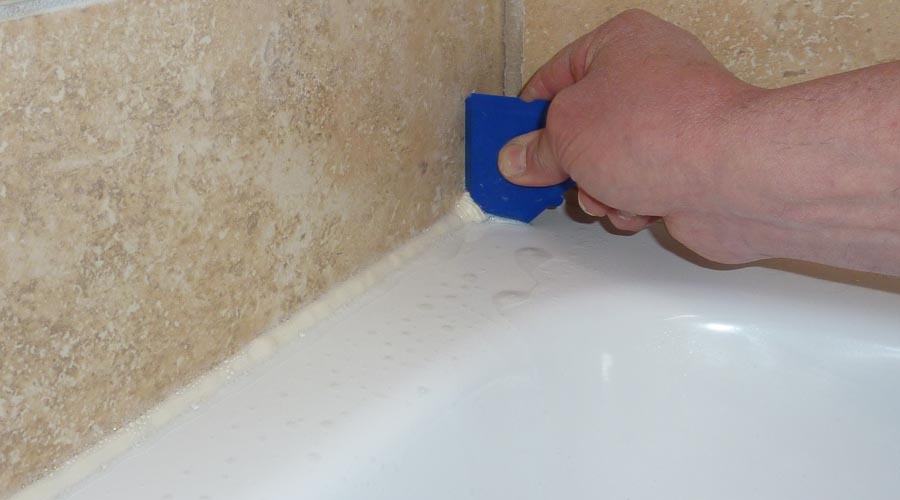
Smoothing silicone sealant to a perfect finish
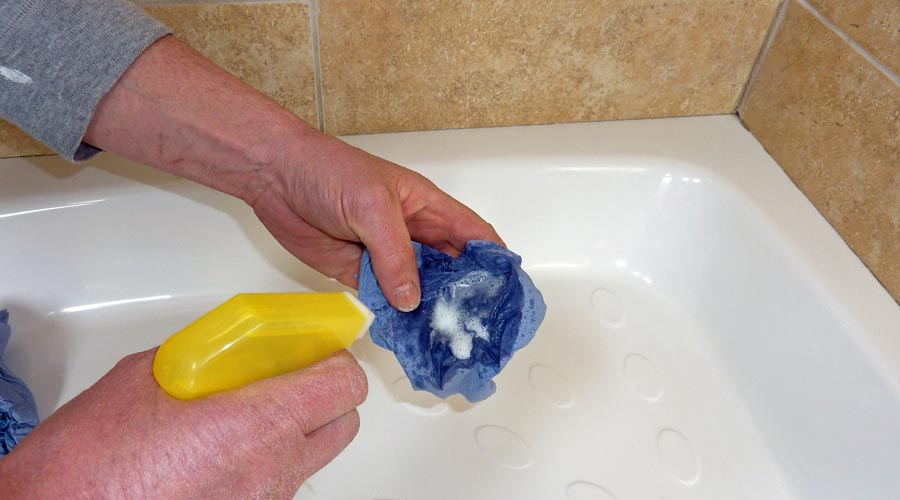
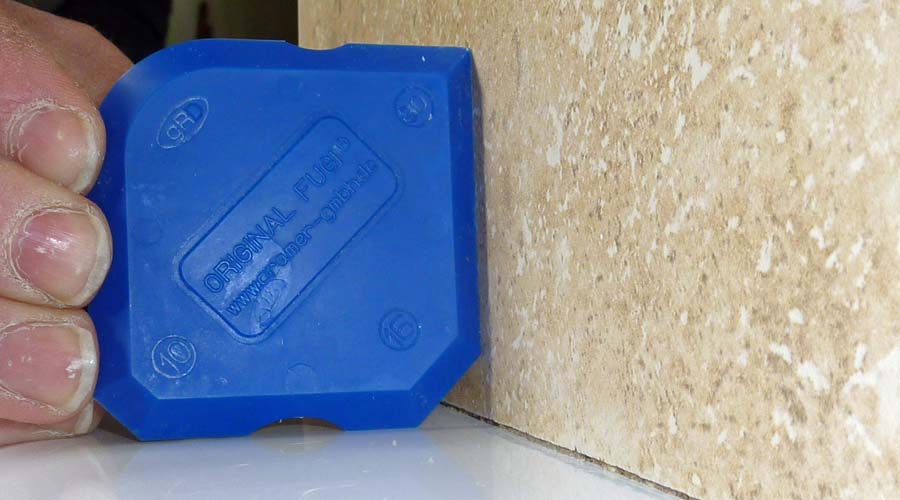
- Start from the corner of the shower tray where the silicone sealant was first applied.
- Place the silicone sealant application tool against the shower tray surface and tiled wall and draw the it along the bead of silicone sealant while apply gentle but consistent pressure to leave a neat and consistent bead with no visible gaps.
- If any gaps are visible quickly add a little more silicone sealant to the area and repeat the process to remove the access with the application tool.
- Clean the excess silicone sealant from the silicone application tool with paper towel and dispose of the waste in a rubbish bag immediately after each use.
- It is important NOT to keep smoothing the fresh silicone bead with the application tool as the surface with begin to cure quite quickly and can tear, become untidy and in some cases may not adhere correctly. Appling silicone sealant is best done carefully and only once to achieve the best results.
- The final stage is the easiest but also the MOST important. The freshly applied silicone sealant must be allowed sufficient time to cure fully. Generally curing takes a minimum of 24hrs although this can vary from brand to brand and it is therefore important to carefully read and to follow the manufacturer’s application instructions exactly.
Silicone sealant application top tip
Shower trays can settle when the weight of a person is placed on them and the same is true of baths when they are filled with water. The downward pressure can cause the silicone seal to tear and water to leak past the seal. Placing weight inside the tray or filling the bath with water prior to sealing the shower tray and leaving it in place until the silicone sealant has cured fully will avoid this issue!
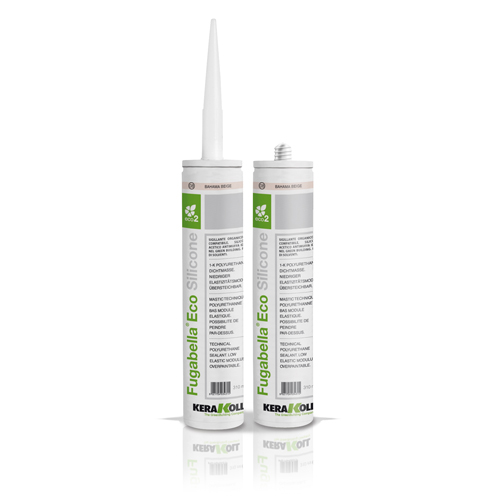
UK Tiles Direct stock a wide range of high quality sanitary silicone sealants in a range of colours and are agents in Dorset for Kera Koll Eco-friendly sealants, tile adhesives and grouts. Furthermore, our sister company, Room H2o, are shower enclosure specialists offering standard, made to measure and bespoke shower enclosures and professional installation services in Dorset, London and the South East of England. Please contact us for high quality sanitary silicone sealants or for more information regarding our shower enclosure services.